There are times when we need to prepare files for clients or models. Commercial client orders typically mean we’re delivering larger files for printing, and smaller files for web use. Family portrait orders should not include larger files because we should be selling physical prints and albums, but often we do give those portrait clients some web files of their shoot.
So how can we do all of this quickly? Well I just finished teaching my Adaptive Lighting course to photographers on the Utah Salt Flats. I personally need to process and deliver images to the models involved, so I thought I’d made some screenshots to show you how to do this.
I do walk through this and much more in my Photoshop courses, but this short article should help quite a bit.
1 – Process and Export Favorites from Lightroom
I’m assuming before we begin, that you’ve already marked favorites in Lightroom, made adjustments if necessary, and have exported them out into a folder of full sized large JPGs. Of course maybe you’ve retouched some as well, and have a separate folder of layered files. This process will work with either or both of those folders.
2 – DPI Means Nothing
Despite the common myth, changing your photo’s DPI or PPI does nothing. For example, if you have an image that is 8,000 pixels wide on the long end and is also 72 dpi, that image is not lower quality than a 2,000 pixel file with 300 dpi. DPI means nothing in terms of print quality. What matters is the total number of pixels in the image, and that’s best measured by the pixel measurements (height and width).
So to decrease the image size and quality, it’s quickly done by decreasing the image’s pixel count using the largest side.
3 – What Are Some Good Settings?
For my example, I’m sharing images with the models in exchange for coming and modeling at the event. This is typically called “TFP” for Trade for Prints. We could pay the models, and/or the models could pay us photographers for our images and expertise. But specifically for workshop training events, trying to figure out the value and amount of who pays whom is hard. It’s much easier to trade services both ways and do TFP for workshops.
So I treat the models as Commercial clients, and give them large and small images. Large images for printing images for their portfolio, and smaller images that are ready to post to the web or socials. Sharing full-sized images is overkill with the camera files we produce, and isn’t needed. Those large files are also cumbersome to transfer online.
Therefore batching out our favorite images to large and small files for the model is needed. Here’s my general settings.
Batch Image Settings
For Larger Print images, I use 3500 pixels on the long side at a JPG Quality = 10. That’s great for all sorts of printing, but decreases the overall megabytes down to a size that’s easily sent over the internet.
For Smaller Web images, I use 1500 pixels on the long side, at a JPG Quality of = 9. Most websites and even social media likes images to be around 1000 pixels on the long side, so this makes them look good or gives the ability to crop in a bit if needed.
4 – Batch Out Larger Print Images
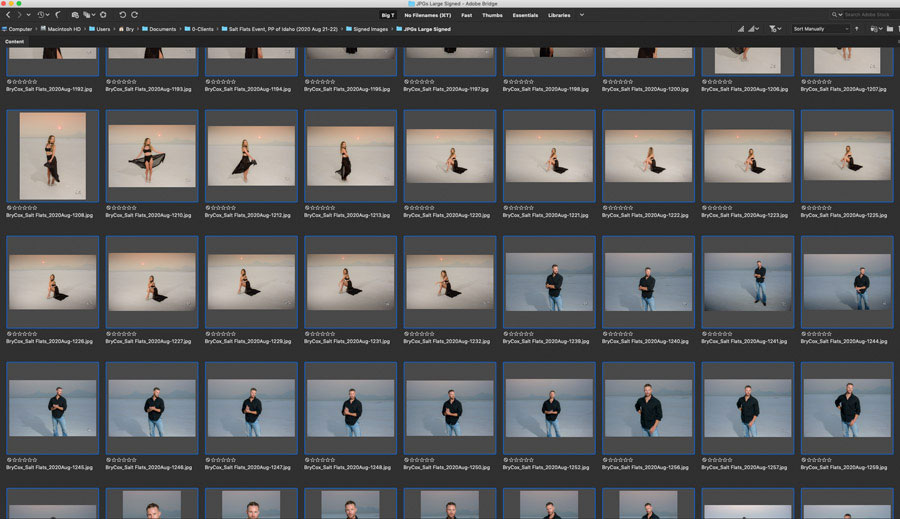
In Bridge, open your folder of large images (previously exported from Lightroom). You can also do this with any folder, for instance your retouched layered files too.
Select All images by using Command-A.
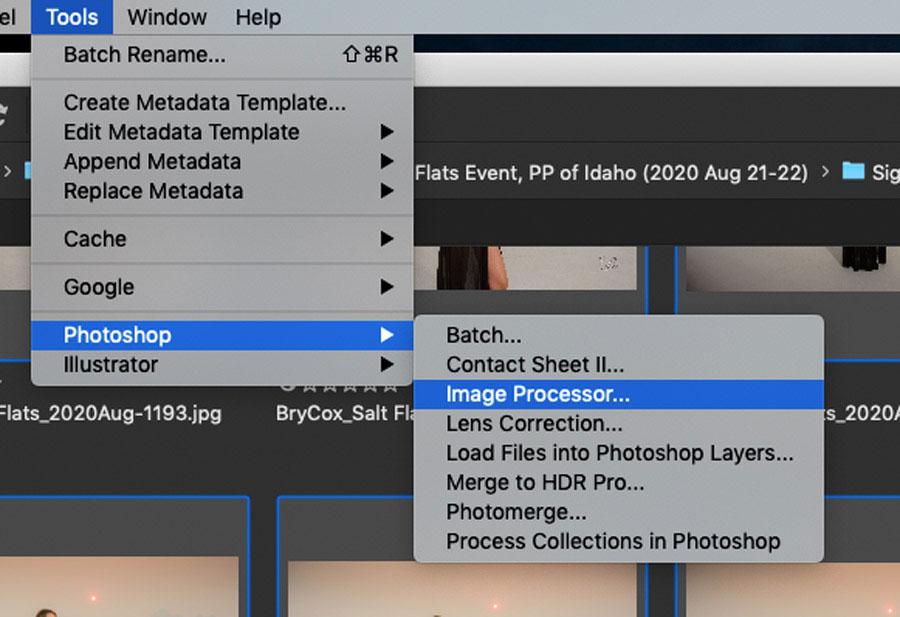
After they’re selected in Bridge, go to Tools > Photoshop > Image Processor.
That will open Photoshop, and there’ll be a dialog box that looks like this below.
Box 1 will already be filled in. It means “Do THIS to the images I’ve selected in Bridge,” which is all of them because we selected them all.
Box 2 choose a location for the new images. I like my Desktop. Don’t worry. It won’t fill your computer’s desktop with photos. It’ll make a folder on the desktop and fill that folder.
Box 3 choose JPG. And because we’re first making the larger print images, choose Quality 10, and Resize to fit 3500, 3500.
Also make sure you check the box for “Convert Profile to sRGB” too. It’ll make life easier for the models/clients.
Box 4 I like my © info in there.
Then click Run.
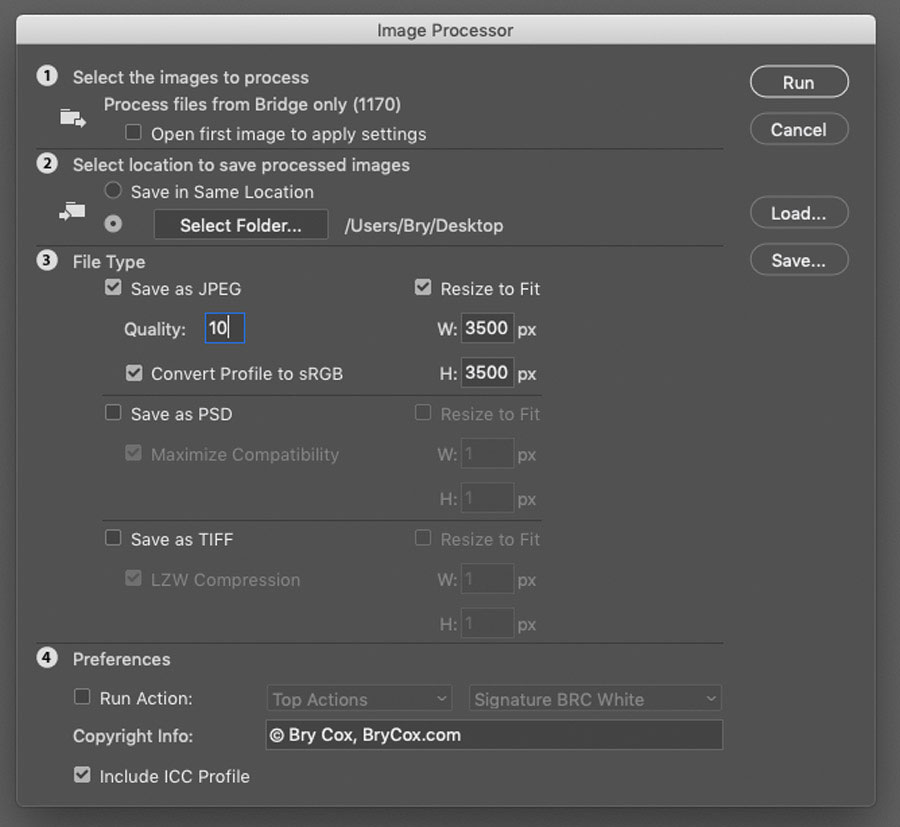
Because we selected the JPG box, Photoshop will create a folder on the desktop called “JPEG” and fill it with the new images.
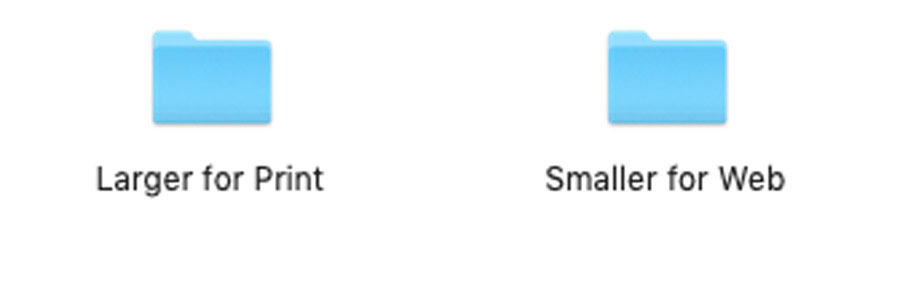
When it’s done batching them all out, go to your desktop and RENAME that folder. I like a name like, “Larger for Print,” and then put that folder where it needs to go. Don’t leave it on your desktop. I typically have a folder inside the photo shoot’s folder called “Files for Client.” I would move this into that folder.
5 – Batch Out Smaller Web Images
You can now do this again, but for smaller web images. You can even use the new “Larger for Client” folder. It’s smaller in size than the original JPG folder, and will therefore run even faster.
Your settings are all the same except for for Quality and Resize to Fit. Those settings for web images would be 1500 pixels on the long side, at a JPG Quality of = 9
When it’s done, go to your desktop and RENAME that folder. I typically use a name like “Smaller for Web.”
6 – You’ll See a Big Difference In Size
For me at this Salt Flats event, my full sized JPGs of just my favorite images is 17 gigs!
However, the “Larger for Print” folder of all the same images is less than 1 gig – only 800 megs. Huge difference and much faster and easier to share.
7 – Batch Re-Name Files to Avoid Confusion
Finally, I like to Batch Re-Name the images in the two new folders I’m giving the client. That way the client doesn’t get confused or accidentally over-write files if they store them in an odd way on their own computer.
This is easily done by just appending the name “_Print” and “_Web” to each set of images accordingly.
To do that, open the first set of images in Bridge. Let’s open the Larger Print images.
Select them all by using Command-A. Then go to Tools > Batch Rename.
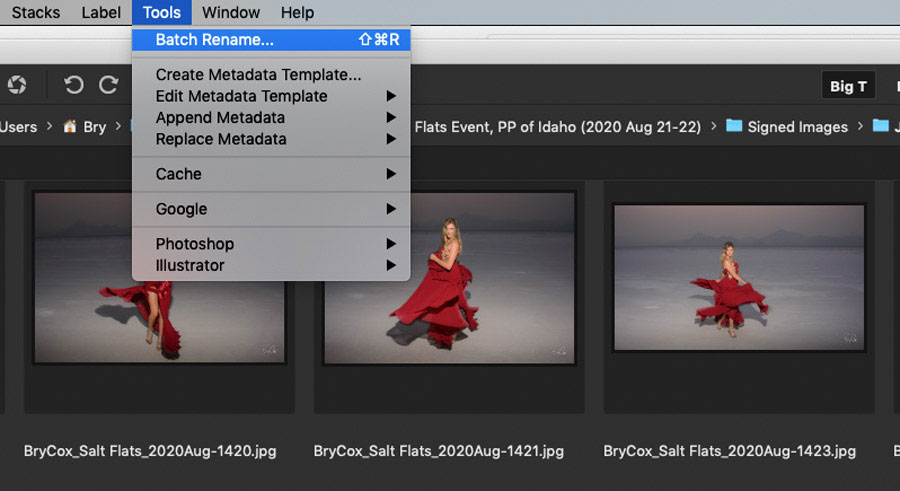
For Destination, choose “Rename in the same folder.”
Under New Filenames, you can use the + or – buttons on the right to add or delete fields if you need. You’ll need 2 fields for this.
For the first field choose “Current Filename” and for the second field choose “Text.” Then for the new text in field 2, add “_Print”
Using the underscore before “Print” means the filename will look clean and readable.
When you’ve got it set, hit Rename.
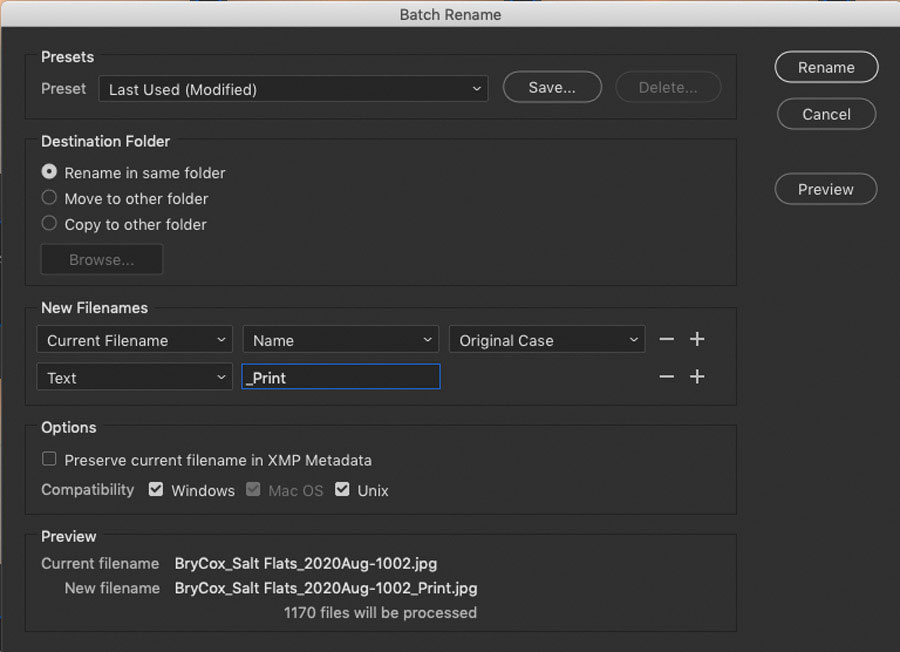
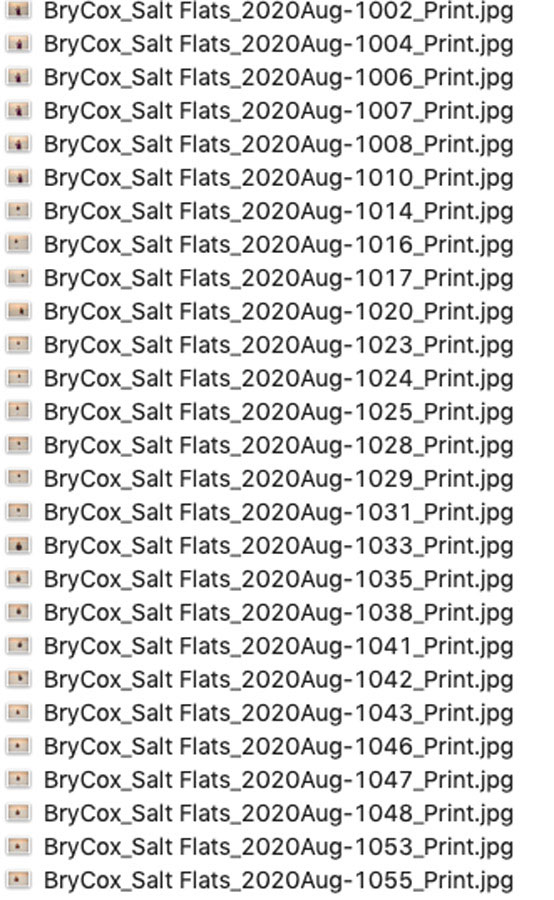
Your files should look like this. The original name, but with the text “_Print” at the end.
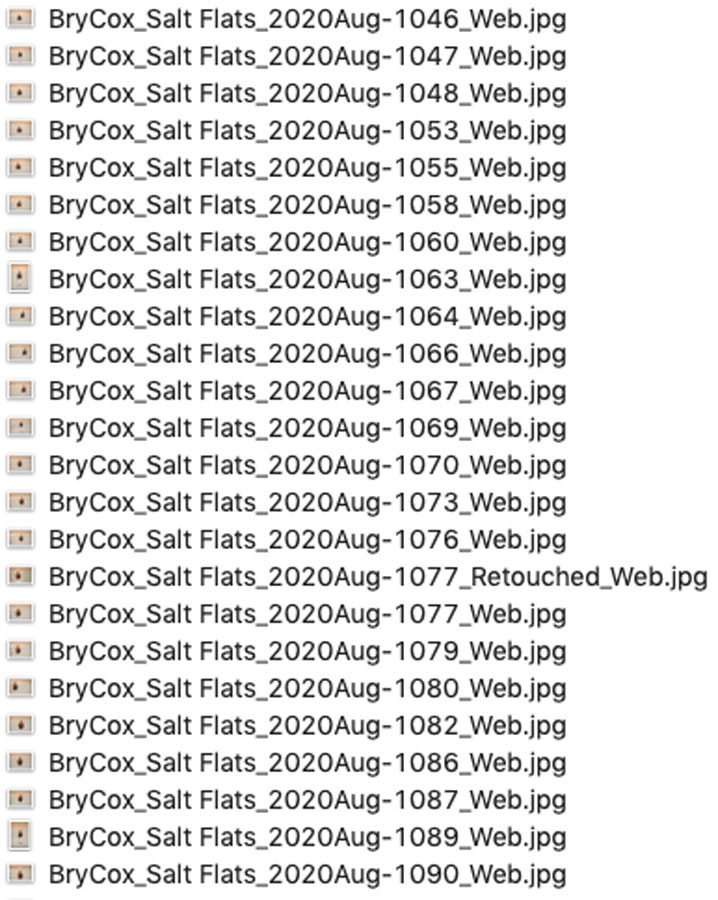
7 – Batch Re-Name Web Sized Images
Now just do this again on your Web Sized Image folder. Open that folder, select all images, and run the Batch > Rename.
Just change the text to “_Web” this time. Those image names will now look like this.
8 – Do it Again for Retouched Images
Normally, a commercial client or family client would only get my final retouched images. Not all the favorites. The retouched images are the ones that were paid for, ordered, and worked up.
However, in this example I’m giving models images for TFP, so I want to make sure they have some of my other favorites too, whether I retouched them. I feel great about sharing my un-retouched images because my lighting and color is right on the money. (My images should look better before Photoshop than other Photographer’s images do after their Photoshop work. If you’d like to learn how to nail your lighting, check out my lighting course online here.)
My final retouched photographs are my best versions however, so I want to add those to this model’s folder.
I simply do the same steps above to my retouched layered files. And when it comes time to rename them, I append the filename with the text “_Retouched_Print” or “_Retouched_Web.” I then put those images in their appropriate folders.
As you can see above, there’s one image (#1077) that is retouched. Therefore I removed the un-retouched one of that same image in both the Print and Web folders. I’d rather them only see and use the retouched version if it exists, so I remove the un-retouched one.
9 – Now Share
That’s it. Now share the images via USB drive, DropBox, or zip the folder and send it using WeTransfer. I hope that helps.
And until next time, America.