[Updated with a new video March 2015]
This video will explain how to get both your exposure and white balance perfect in camera. It means never adjusting a thing later.
My goal is to provide the highest quality photograph by working quickly. My philosophy is to do everything I can in-camera, so I don’t have to do anything in Lightroom. Then do everything I can in Lightroom so that I don’t have to do anything in Photoshop. Then when I work in Photoshop, it’s for fun and an investment into my order, rather than corrective.
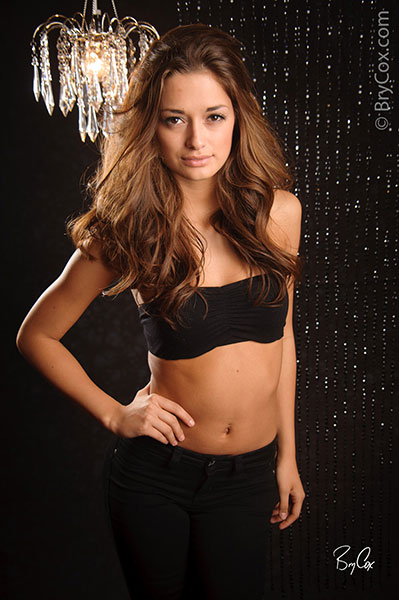
Impossible to get great images straight out of the camera? Here is a sample image created in just a few minutes in front of a crowd while teaching in Texas. (See more about these images here.) This first image has no digital enhancements, no retouching, no lightening, no darkening, no color correction, no cropping. This is straight from the camera, and it looks great! There is expression, contrast, great lighting, and everything technical has been nailed.
Below is the finished image. With some very fast and very slight work, it is done. Compared to the first image, it is better. However, the first image is still great. It’s good enough to sell, good enough to print, and better than most “finished” work out there, and all done in camera.
Imagine how fast you can be on the computer when your images are already done! But instead, the ability to adjust images digitally has made seasoned photographers lazy and has crippled new photographers with bad techniques.
As a photographer in the Bry Cox Club, I hope you join my school of thought, that it’s much better to take a second or two during the shoot to make sure your exposure and lights are measured and set exactly, than to spend hours later adjusting large groups of images.
My 3 Steps to Perfect Exposure & Color
Don’t be a step skipper! If I skip any steps, it means I have to adjust something later. If I adhere to these 3 steps, I save myself work later.
Step 1: Guess.
You have to first make a mental guess as to your exposure, for your three settings on your camera (f/stop, shutter, and iso). Of course your flashes are set on manual, so you guess on their output and set them accordingly.
You have to start with a guess even if it’s a completely random guess. This is part of constantly training your mind to see light and think in f/stops and getting used to your lights. Plus you need to see if your measurements in steps 2 and 3 match what you’d like to see in your mind.
The better you get, the more you’ll start to see it and also use 2 methods for mentally guessing exposure: The Sunny 16 Rule for outdoor ambient light, and the Inverse Square Law for flash output per distance, used to mix with ambient outdoors and for full control indoors.
Step 2: Measure with a Meter.
Measure you light source with your meter. If you’re shooting flash and have multiple light sources, then you must measure every light source and set things as you’d like them. accordingly.
For more on setting lights inside and out, view my lighting series.
Step 3: Set a Custom White Balance & Double Check Gray Histogram.
Think of step 3 as two parts, Part A and Part B. First we will take a custom white balance, and second we will check that gray card to double-check our exposure.
To start, we set our camera manually using the exposure we measured for in step 2. We then take a gray card reading to get a custom white balance. I prefer to do this with an Expodisc.
For a pro-end Nikon cameras, it’s as simple as holding down the WB button, and taking an exposure from the subject in the direction of the main light while holding the Expodisc over the lens. I then take one more normal exposure while still holding the Expodisc over the lens to get a gray card shot.
I then hit play on my camera and look at the histogram for that gray card shot. The histogram should, if exposed correctly, be one single spike dead center. If it’s off to one side or the other, then you go back to steps 1 and 2.
For Canon shooters, hold the Expodisc over your lens and simply take a shot, standing where your subject is facing your lens towards the main light source. Then go into your first red menu and choose Custom White Balance, and select your last shot (gray card shot) as the image to evaluate.
Then hit play and check your histogram. Again, it should be a spike dead center. If not, your exposure is off and you need to go back to steps 1 and 2.
A special tip for Canon shooters is to add this item in your red menu to your custom menu, sometimes called the “My Menu.” This will make it easier to find as you’ll be using this constantly every day, all day.
 (Image straight from camera, no adjustments or retouching)
Extra Tips
For all camera users, make sure your camera is always set to Custom White Balance because you’ll have a problem if you measure a new custom white balance but if your camera is set to Sunny or some other preset. If you’re not set to use your new custom setting, it won’t be applied to your images. So make sure it’s always set to the right ‘Custom’ preset.
Secondly, everything goes faster if you use your focus disable button on the back during step 3. Most cameras want to be in focus before they’ll allow you to take an exposure, and if you have an Expodisc on your lens, there’s nothing to focus on. Your camera will try and try and it will never stop.
Some photographers will slide their camera’s or lens’s focus button to Manual and then back again, but that’s a dangerous method because if you forget to turn it back on, you’ll shoot images out-of-focus without thinking.
So just hit your Focus Lock or Focus Disable button with your thumb while you shoot in step 3. For Nikon and most cameras it’s sometimes labeled “AE-L, AF-L” which stands for “Auto-Exposure Lock, Auto-Focus Lock.”
For Canon users, it’s many times programed as your * (star) key. Some newer Canon bodies leave the star key blank, leaving the programming to you. So if you’re a Canon shooter, read your manual and dig through your menus and figure out how to set the star key as your Focus Disable or Auto-Focus Lock. It’ll make everything go easier for both this as well as other things as well.
Common Objections to my 3-Step System
“But I don’t have a meter.”
Then get one. You don’t need the most expensive meter, but why not have the one piece of equipment that pros consider essential? Instead of buying another piece of equipment, pick up a meter first.
“But I don’t have time.”
Sure you do. First, all three of these steps only take a couple moments. Secondly, if you’re in that much of a hurry where you can’t stop to do these three steps, then you’re going to create more problems outside of this too. Slow down and be in control of your images. Remember that it’s better to create fewer amazing images than tons of crappy images.
Continue On…
This technique is part of a larger system of exquisite lighting and a fast workflow. The next big step is to light women so that their eyes pop and their skin doesn’t need any retouching. That info is here, as well as in my full “Light Like a Master” course.
Happy Shooting and until next time, America.