In my training videos and workshops, I have long taught that a speedy and quality workflow starts with custom profiles for each of your cameras. Well today Adobe has improved and updated the profiles in Lightroom with all new profiles and a better way to access them. I’m excited to share these updates because they will help photographers create better images with better skin tones, and the process is now easier to use too.
In Lightroom Classic CC (and Adobe Camera RAW) the profiles have been moved from the Camera Calibration panel at the bottom, up to the top in the Basic panel. And in Lightroom CC is now getting profiles added to the top of the Edit panel.
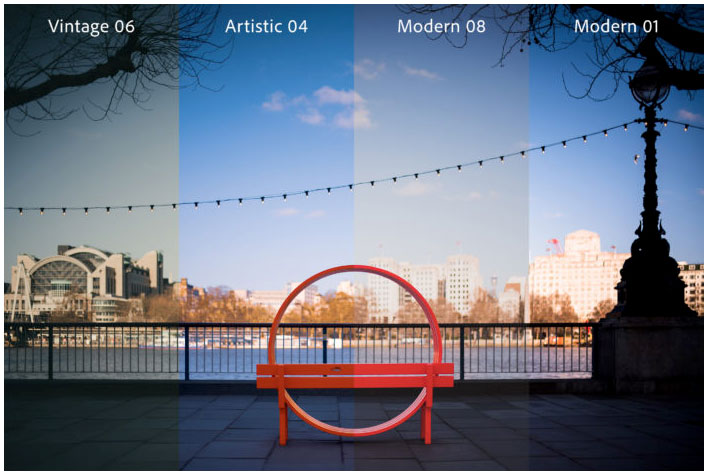
“We’ve also greatly expanded their capabilities with six brand new Adobe Raw profiles, over 40 new Creative profiles, and an all new Profile Browser that lets you quickly compare and select the best profile for your photo. Camera Matching profiles, which were previously available in Adobe Camera Raw and Lightroom Classic, are now available in Lightroom CC. Furthermore, we’ve also started working with a number of top preset creators to enable them to create their own unique profiles, some of which are available today.”
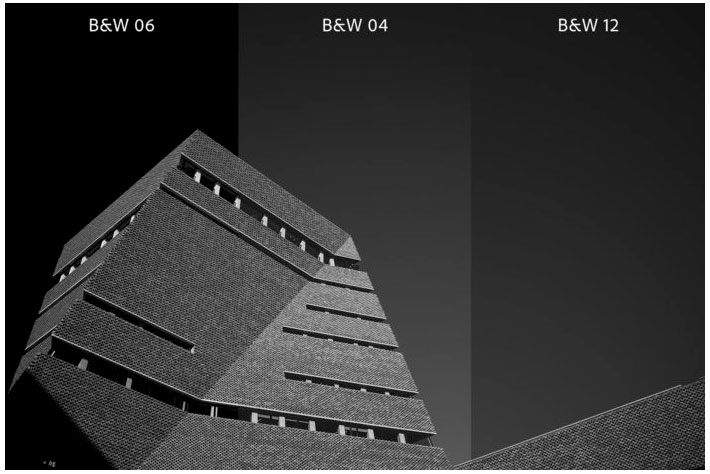
There’s also profiles for new and better ways to make cleaner black and white images…
There’s Six Brand New Types of Profiles
With this release, we’re adding six brand new Adobe Raw profiles, complementing the tried-and-true Adobe Standard. Adobe Raw profiles have existed for as long as Adobe has made raw rendering software (the first version being the plug-in version of Adobe Camera Raw in 2003). In ACR and Lightroom Classic, Adobe Standard was the lone Adobe Raw profile available, and within Lightroom CC (including the iOS, Android, ChromeOS, and Web versions), Adobe Standard was there and used, but you couldn’t change it. Now, we’re introducing six brand new Adobe Raw profiles, and providing access to them within ACR, Lightroom Classic, and Lightroom CC (including on the iOS, Android, and ChromeOS versions).
All of the Adobe Raw profiles, from Adobe Standard to the six new profiles, were created with the intention of providing a unified look and feel, regardless of which camera was used. This can be incredibly helpful when upgrading from one camera to another (you won’t have to spend a ton of time figuring out how make your new photos match your personal style) or if you’re using multiple cameras for the same shoot, you won’t have to worry about some photos looking totally different from the others.
Adobe Standard was designed to be a great starting point for your photos that would enable you to get the most of out them while editing, however it was also created nearly ten years ago. Over that time, we’ve learned a lot about what photographers want and have gotten great feedback on how we can make an even better starting point. From all of this feedback, a new default was born: Adobe Color.
Adobe Color was designed to greatly improve the look and rendering of warm tones, improving the transitions between certain color ranges, and slightly increasing the starting contrast of your photos. Since Adobe Color is the new default (but only for newly imported photos), it was designed to work on the widest range of photos and ensures that regardless of the subject, your photo will look great.
Adobe Monochrome has been carefully tuned to be a great starting point for any black and white photograph, resulting in better tonal separation and contrast than photos that started off in Adobe Standard and were converted into black and white.
Adobe Portrait is optimized for all skin tones, providing more control and better reproduction of skin tones. With less contrast and saturation applied to skin tones throughout the photo, you get more control and precision for critical portraiture.
Adobe Landscape, as the name implies, was designed for landscape photos, with more vibrant skies and foliage tones.
Adobe Neutral provides a starting point with a very low amount of contrast, useful for photos where you want the most control or that have very difficult tonal ranges.
Adobe Vivid provides a punchy, saturated starting point.
How to Use Profiles
Here are a few short videos by Julieanne Kost of Adobe, showing the power of profiles on Raw images, and how to use them in this latest update.
The Power of Profiles
The Power of Profiles in Lightroom Classic
For even more info…
If you want even more info, here’s a link to all the details in this latest update.
And until next time, America.