
At the beginning of any photo shoot and occasionally during the shoot, you need to have a system of checking the various settings on your camera. Just as you would do before taking off in a plane, you should have a specific list of settings that you check before starting a shoot. This should be a habit whether it’s an all day event your photographing, or some small thing.
I personally do this for two reasons. First, I want the highest possible quality in camera so I can avoid having to do computer work later, and second I want to avoid the problem of having something set wrong on my camera and not noticing it until later. Hopefully you’ve never had the horrible feeling after a shoot of noticing that your auto-focus was bumped off during a shoot, or your ISO was left up too high from your last shoot. We can avoid stress and potential problems by having a series of things that we check on our cameras.
There are two versions of my ‘Pre-Flight Checklist.’ One is more extensive, and it run through it before a shoot starts. The second version is slimmer, and I run through it occasionally during a shoots, especially when I get a lull.
Pre-Flight Checklist for My Camera
(Pre-Shoot Version)
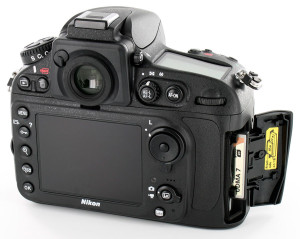
- I first check for storage cards, making sure the camera is gassed up.
- I turn on my camera and check the battery level.
- I check that the camera is saving in RAW format, and not JPG.
- I hit play on the camera to see if the cards are truly empty. (The way I download the images off the cards, they should be empty once they go back into the camera. So if the cards show images when I hit play, I turn the camera off and swap out for cards that are completely empty.)
- Having double-checked that the cards are empty, I format the cards using the camera’s menu options. This is quick work on a Nikon by holding down two shortcut keys.
- I then check that the camera is in Manual mode.
- Knowing it is in Manual, I then check each of the three settings for manual exposure, ISO, shutter speed, and f/stop. I am setting all three numbers deliberately for my best guess of exposure, taking into consideration the look each number will give the final image visually. I will meter later.
- I then check the color mode, making sure it is on my custom white balance preset, Custom #1. (All cameras have a some custom white balance option which uses the white balance from a measurement you give it. It holds that measurement until you give it a new measurement. Some cameras have the ability to measure and save multiple custom white balances into various slots, #1, #2, #3, etc. I don’t use those because I will be measuring and re-measuring white balance throughout the shoot. I only want to use the first custom slot, the setting that uses the newest white balance I measure. As I change lighting, I will re-measure and will always use the newest measurement.)
- I then test my flash sync radios to make sure that they are firing my flashes.
- Finally I check the focus switches on my lens and body to make sure nothing has been bumped. They should both be on Auto-Focus and not on ‘Off’ or ‘Manual’ Focus.
At this point, I am ready to meter, create a white balance, and begin shooting using my 3-steps to a perfect exposure and white balance.
Why Do This?
Sometimes when I teach a workshop, people will have a disagreement with checking these things, saying, “But I set those kinds of things when the camera was new. I don’t have to check them again. They don’t change.”
But the problem is that they do change. Pulling your camera in and out of your bag, little knobs and dials get bumped and settings get changed. Using your camera changes things too. Maybe you specifically changed something for a moment, meaning to change it back and forget. Or maybe a dial gets bumped as it rubs against your clothing as you lift the camera up and down between shots.
And especially if something isn’t working right, you should be able to quickly diagnose the problem and get your gear back up and running again quickly. But most importantly, you should be aware of every setting. They should be deliberate settings, and you should have a routine for checking them. You can never completely get into a shoot emotionally if you’re worried about your gear not working correctly.
In-Flight Checklist for My Camera
(During-the-Shoot Version)
During the shoot, locations can change, lighting changes, and you also have different ideas of visual expression which means your camera settings much change too.
Here is what I do constantly throughout a shoot. I don’t go through the entire Pre-Flight Checklist because I did that before the shoot started. Instead during the shoot, I use a simplified list throughout the shoot called my In-Flight Checklist. However if at any point I encounter a problem, I will problem solve it by going back to the longer Pre-Flight version of my list.
- I pull out my hand-held meter and check both the meter’s exposure mode and ISO setting. The mode could be set on Ambient, Flash, etc. I make sure it is on the one I want.
- Using a mix of my meter and my own estimating using the Sunny 16 rule (for ambient light) and Inverse Square law (for flashes), I come up with an exposure.
- I take a new color balance reading (and save it to the Custom #1 slot in my camera) and check the histogram of perfect gray for my exposure, all explained in more detail in my 3 Steps to a perfect color balance and exposure.
- I double check all three exposure settings (ISO, shutter, f/stop)
- I double check my focus settings on my camera body and lens.
It’s that easy, but it should be habit.
There are lots of cameras out there, and tons of buttons and settings you can adjust. But your ability to pick up a different camera (maybe a backup, a rental, or even a friend’s camera) and do amazing things with it come down to your ability to run through this checklist on that camera.
I have personally taught crowds of people using demo cameras that I’ve never held or used prior to the event. At one particular event, Canon was swapping my cards as I shot and printing out large prints with no correction or retouching. They wanted to show how good their cameras and printers were, and the images that were coming out all looked great. But what was the secret? It was in me, the artist, being in control of the camera.
I didn’t have to get an early version of the camera and practice with it before hand. Instead I asked for a .pdf of the manual. I simply looked up how to do each of these things from my checklist on the camera. As long as I know which menus and buttons get me through my Pre-Flight and In-Flight Checklists, then I’m good to go an any camera, regardless of brand.
To understand your camera settings like f/stop, shutter, and ISO better, click here.